Trailblazing Start
I went from couch to confident day‑hiker with a simple five-step plan. Crazy fact: carrying just 10 unnecessary items can add over 10 pounds to your pack. I share clear, practical steps to plan, pack, train, navigate, and stay safe.
What I Carry and Know

Plan the Route Like a Pro
Why I obsess over elevation profiles — distance lies, hills don't.Choose a route that matches my fitness, experience, and available time.
Research trail length, total ascent, estimated duration, and surface using guidebooks, trail apps, recent trip reports, and official park pages.
Pay particular attention to the elevation profile because steep miles take far longer than flat ones — for example, 2,500 ft of gain in 3 miles will slow me down dramatically.
Check seasonal hazards like snowfields, river crossings, or extreme heat and note permit requirements, trail closures, and parking limits.
Mark clear turn points, junctions, and bailout options on my map and in my phone so I can make safe decisions if conditions change.
Plan a conservative daily mileage and add buffer time for photos, breaks, and unexpected delays.
Share a detailed itinerary with a trusted contact that includes start/end times, route waypoints, and emergency numbers.
Scout water sources and decide how much I’ll carry versus where I can refill.
Revisit the plan the night before and at dawn to adjust to fresh weather reports and my energy level.

Pack Light, Pack Right
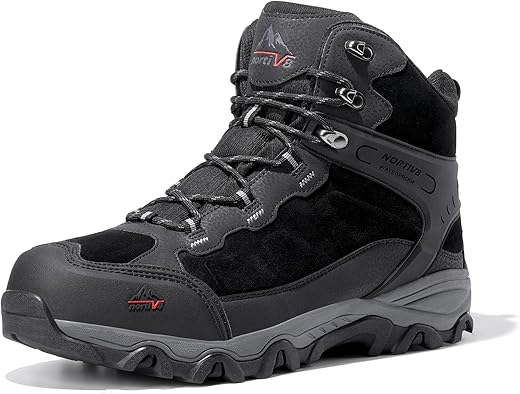
What I never leave home without — and the mistakes that taught me.Start with footwear that fits my feet and the terrain. Break in boots or trail runners at home — ill-fitting boots taught me humility on a wet scree slope, so I don’t repeat that mistake.
Layer clothing for temperature swings and pack windproof and waterproof outerwear. Choose breathable fabrics and a warm mid-layer I can add or shed quickly.
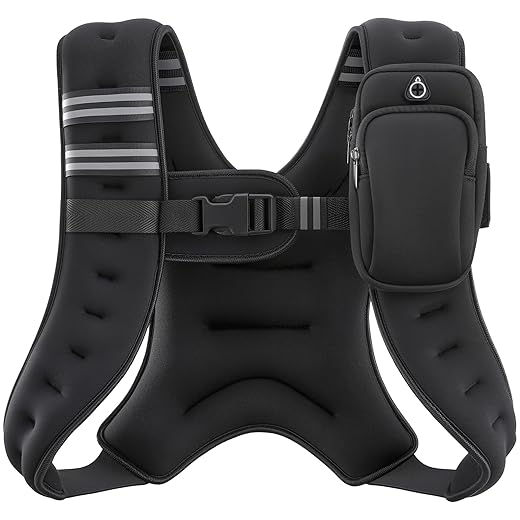
Select a backpack that distributes load and matches my torso length; adjust the hip belt so the pack rides on my hips, not my shoulders.
Pack essentials and prioritize by weight, redundancy, and function:
Organize gear for quick access — snacks and map on top, rain jacket in a hip-belt pocket, first aid within reach. Practice packing and repacking at home until I can assemble or adjust my kit in under ten minutes.

Train for the Trail
Small daily habits beat heroic single workouts — here's my secret.Build: I build fitness with a mix of hiking-specific workouts and general strength training, prioritizing consistency over intensity. I progress loaded hikes gradually, adding distance and elevation each week to avoid surprises.
Hike: I hike with a loaded pack on back-to-back days to simulate fatigue and I use stair and hill repeats to improve leg strength and breathing control.
Include: I do core and posterior-chain exercises twice a week to protect my lower back and knees — I choose movements that transfer to hiking.
Maintain: I practice pace management by walking at sustainable speeds, avoiding sprinting flats and then stopping on climbs; I train myself to conserve energy with steady rhythm.
Simulate: I train on loose rock, wet roots, and uneven terrain so my ankles and proprioception adapt before I hit remote trails.
Test: I mirror trail eating in training — trying bars, gels, and electrolyte mixes on long sessions so my stomach learns what tolerates well.
Use: When time is limited, I keep fitness with focused intervals or loaded step-ups at home.
Schedule: I prioritize recovery days with mobility work and sleep so adaptation happens between sessions.
Hike Smart on the Trail
Little tactics that saved me hours (and blisters) — try them.Start each day with a warm-up walk and mobility drills to wake my stiff muscles and reduce injury risk.
Do quick warm-ups before the climb:
Use a cadence I can hold for hours and a breathing rhythm that prevents side stitches (for example, inhale 3 steps / exhale 2).
Move with shorter steps on steep climbs and use my poles to share load; lengthen stride carefully on descents and engage hips to take pressure off my knees.
Plan regular snack breaks before I feel low and drink small amounts frequently to avoid dehydration.
Read terrain ahead, pick firm foot placements, and take the high or dry line when possible to minimize slip risk.
Keep group communication simple and clear, calling hazards and route choices early so everyone reacts the same way.
Stop to layer and reassess when weather turns rather than pushing on in poor visibility.
Practice Leave No Trace: pack out waste, stay on durable surfaces, and avoid disturbing wildlife.

Manage Risk and Emergencies
Don't panic — my emergency checklist that actually works.Practice safety as a skill: I check the forecast, set a strict turnaround tied to daylight and my energy, and refuse to gamble on improving weather.
Plan navigation: I read maps and take compass bearings before departure, carry paper maps, and avoid relying solely on batteries or cell coverage.
Pack an emergency kit:
Practice skills regularly: I rehearse splinting, basic wound care, and decision scenarios—lost, out of water, or a sudden storm—so I act calmly with a clear playbook.
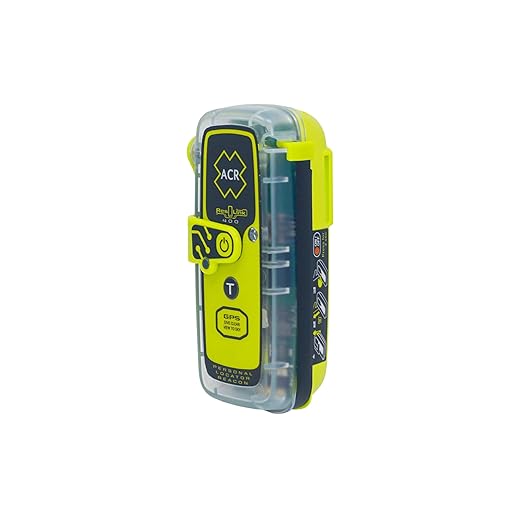
Prioritize scene safety: I secure the area, apply basic first aid, and call for help; if cell service fails I use my tested satellite device. For example, when a partner sprained an ankle I splinted, insulated them, and messaged for an evacuation.
Review contacts: I save emergency numbers, brief my emergency contact on route and ETA, and confirm check-in times before I go.
Finish Strong
I wrap this plan into routine: I plan thoroughly, pack smart, train consistently, hike mindfully, and respect safety. When I follow these steps I enjoy trails more, return safer, and push my limits with confidence. Try it and share results!